


I’ve been asked how I made the MontOrgueil picture, so here’s how it was done.
What is Mont Orgueil? It’s one of the world’s finest examples of a medieval castle and has overlooked the beautiful fishing village of Gorey for over 800 years. It is well worth visiting and Jersey Heritage makes history come to life here. It is great fun for children as well, including dressing-up in period costumes.
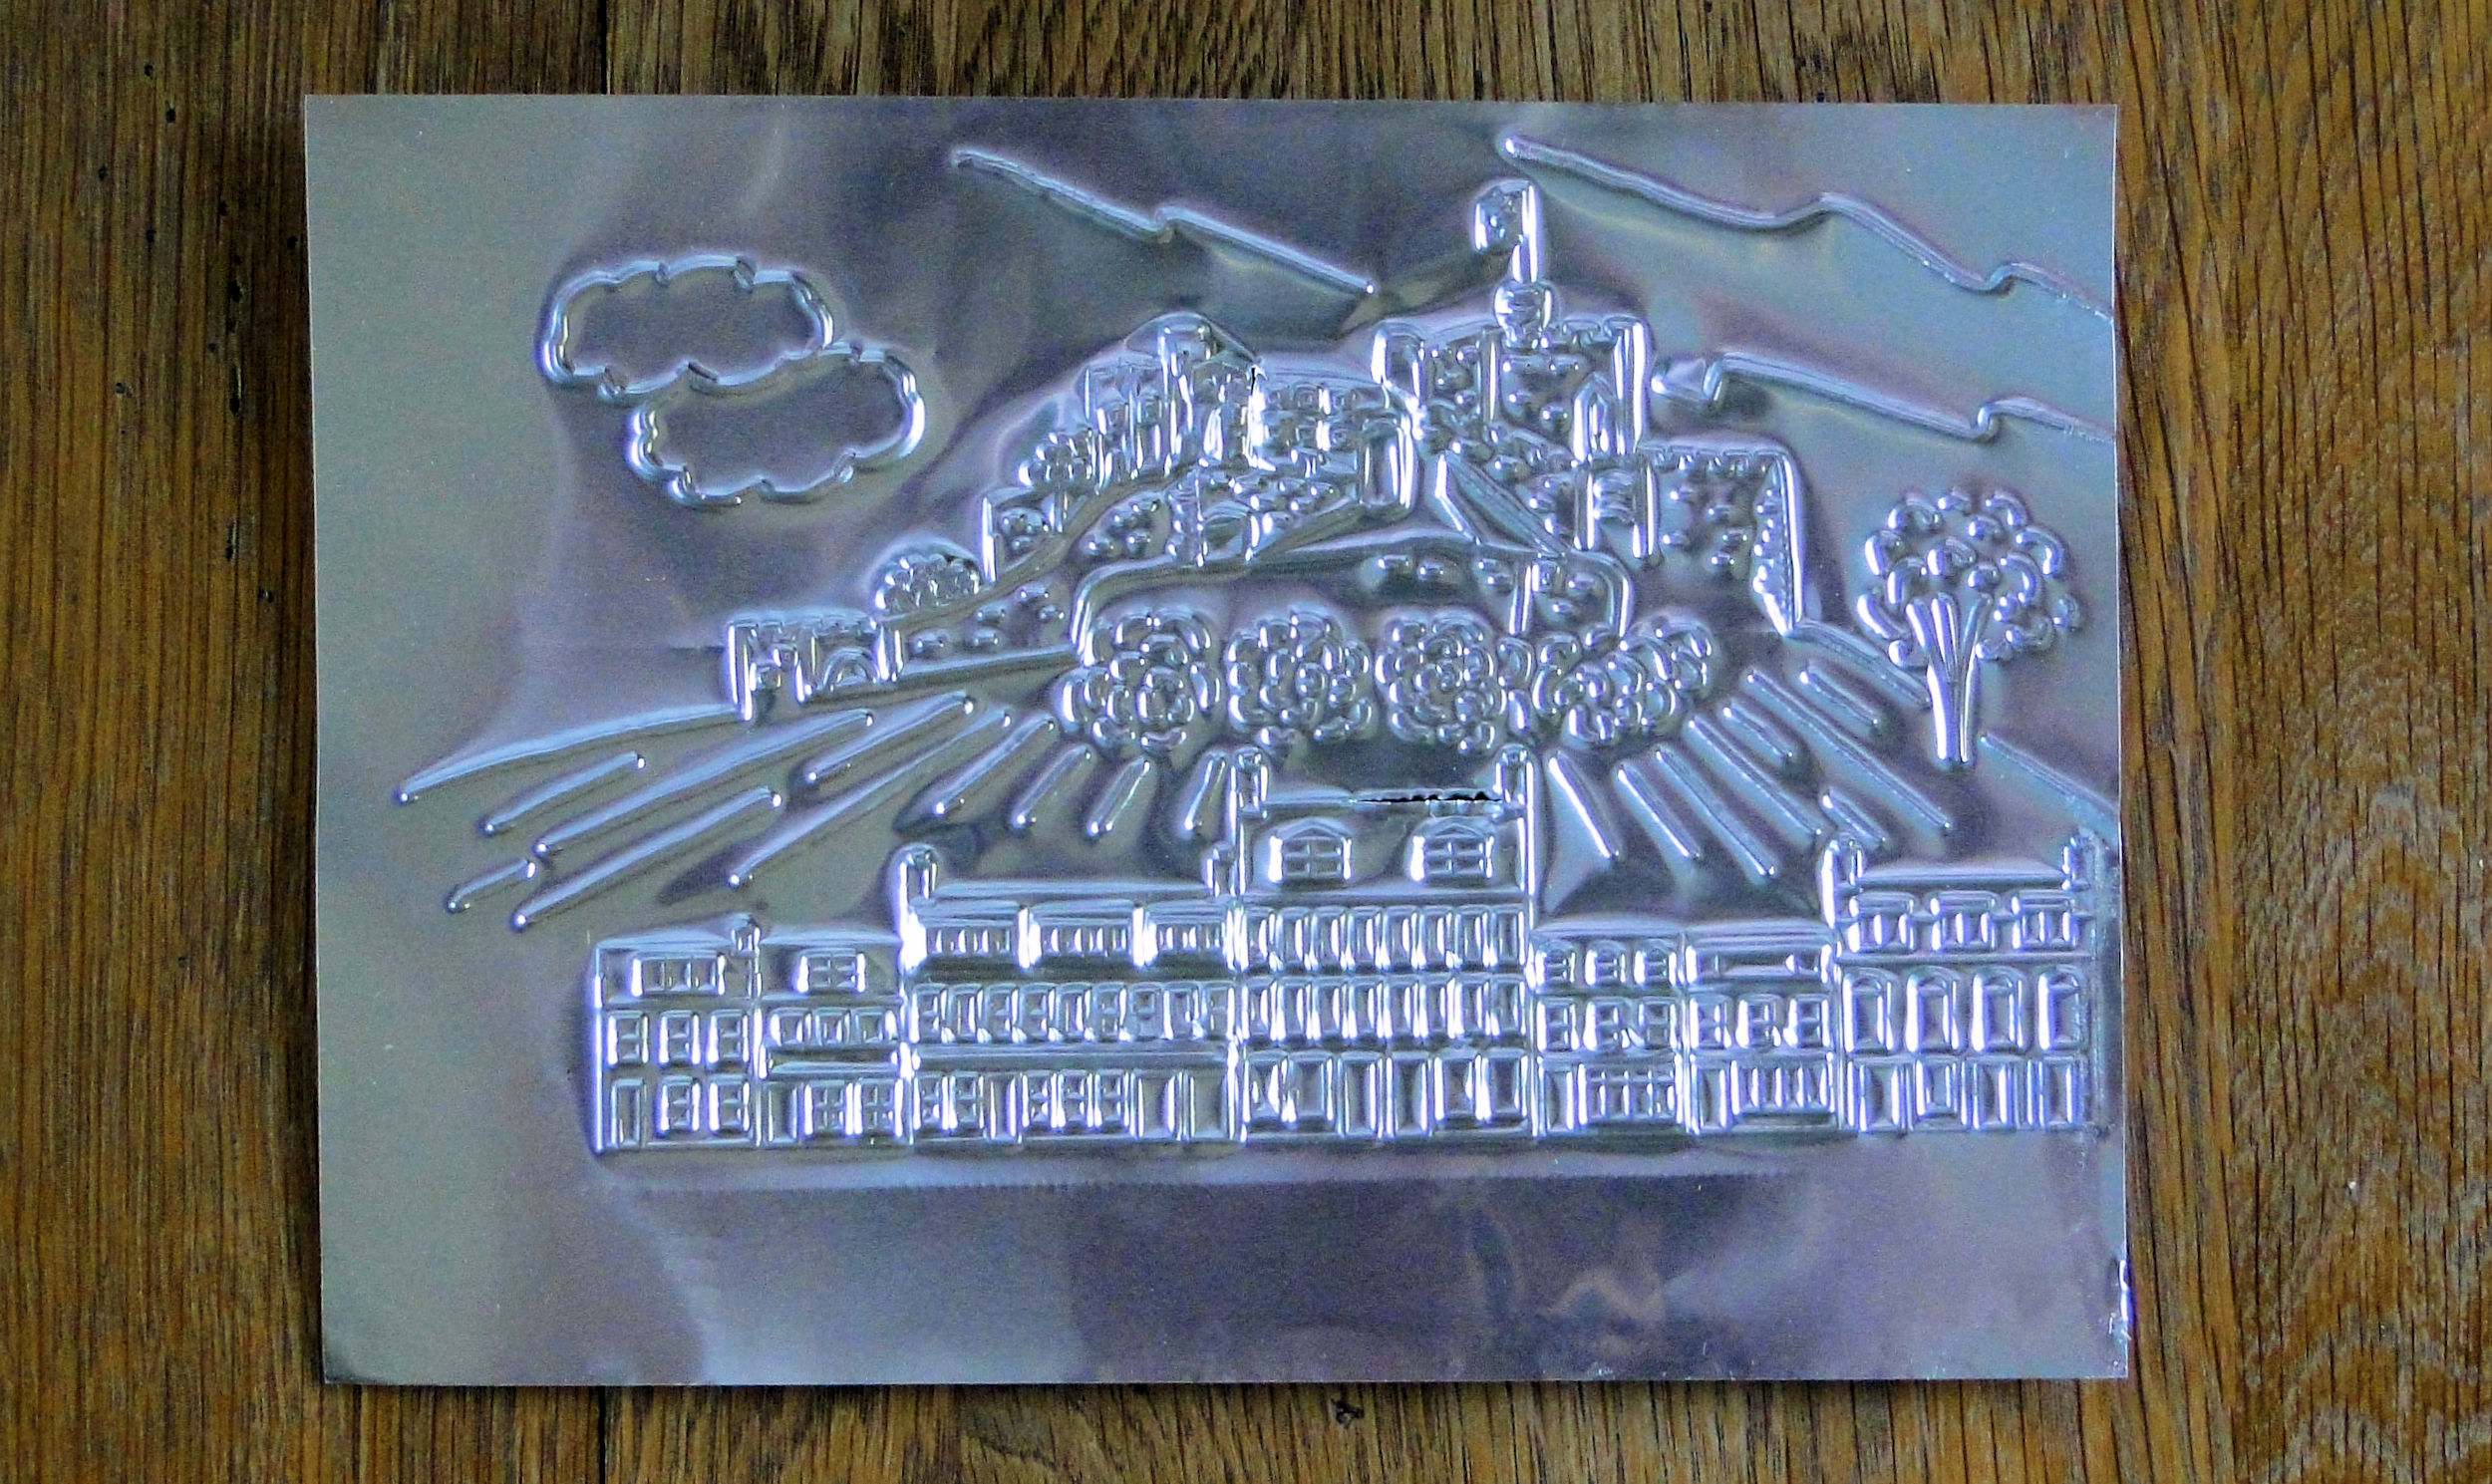
Onto the picture…. it is made with sheet metal and enamel and acrylic paint. As well as that, it took a lot of patience as it took 16 attempts before I got it right (I dropped an embossing tool on number 15!).
Before you do anything, you need music! This CVD from Jersey-based band Electric Brick helped to “power-me”. It reminds me of Jimi Hendrix, 1970s prog-rock with good production and musicianship. Well worth a listen.


Step one - back to basics with plain white paper, a soft pencil, ruler and eraser.

You will need one or more clear photos of the subject. I took a trip to Gorey to take photos of different angles of the castle to make sure I could see all its features. I found it easier to print the photo and draw from that.
Why didn’t I use graphics software or trace the picture of the castle? When working with metal you need to be careful of crossing lines and metal fatigue from detail that is too close together, so drawing it allowed me to take this into account, as well as improvise on some of the details.

Here’s the finished sketch of the castle.

The row of buildings beneath it was done on the PC, because it is essentially all straight lines. I did draw it by hand with the ruler, but the PC option made sense for that part of the picture.
At this point, I scanned the whole picture into the PC. This allowed me to print it as a mirror image, which is important for the next step.
Now it’s time to emboss the image onto the metal. One way of doing this is to place the sketched picture on top of the metal and trace it using a rollerball pen. Do it lightly, as you can emboss the lines deeper with an embossing tool when you have the entire picture traced.

Turn the metal over and the image is the right way round. Embossing actually takes a long time and it is important to emboss both sides of the metal to ensure the lines are crisp and defined. Different sized embossing tools help with the definition.

I previously mentioned that it took me 16 attempts before I got it right. The previous versions allowed me to experiment with the enamel and acrylic paint colours, I decided to paint the lower row of buildings all in grey as this doesn’t detract from the castle which is the main feature.
And here it is, the finished piece!